Chez le Docteur by Satie: Lesson Ideas
| Site: | ABRSM: Teacher Hub |
| Course: | Chez le Docteur by Satie: Lesson Ideas |
| Book: | Chez le Docteur by Satie: Lesson Ideas |
| Printed by: | Guest user |
| Date: | Wednesday, 1 April 2026, 7:19 AM |
1. Introduction and warm up activities
Meet Ana! From an early age Ana developed a strong passion for teaching and since 2008 she has been teaching cello and conducting string orchestras at different independent schools and institutions in Berkshire. In this resource Ana shares some ideas about teaching Chez le Docteur from our Grade 3 syllabus.
When introducing a new piece to a pupil it is very important to build a clear picture of the character of the musical work before they play their first note with their instruments. I will perform the piece to them or preferably play an audio recording with accompaniment that I consider of good musical quality, so that they can build a clear idea of what they are aiming for as a final result. We discuss the composer, cultural background and time when the piece was composed. If the lesson time allows, looking at other forms of art of the similar period can be very inspiring. If the session is short, I would ask my pupil to read the footnote out loud from the bottom of the page, as it is concise and helps to achieve this aim.
Warm up activities
Ask your pupil to check the time signature and key signature of the piece. Play through the scale and arpeggio together with your pupil, remembering specific fingering patterns, such as when to use fingers 2 and 3 in the first position, to apply it later to the piece. It could be a good idea to discuss the different dynamics of the piece at this point and try the scale/arpeggio with different volumes.
Maybe during the second lesson, a good warm up to this piece would be to practise some sight-reading in this particular key.
2. Pitch
Ask your student to identify scale and arpeggio-like patterns in the piece. Examples of these are: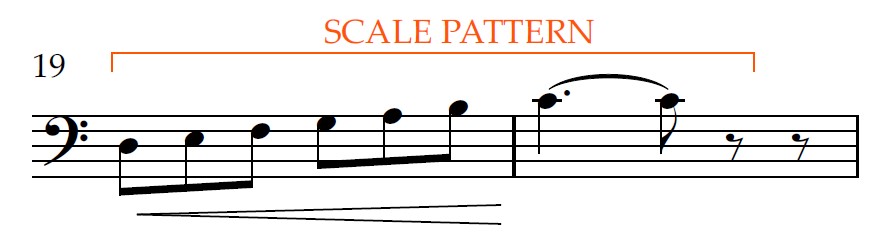
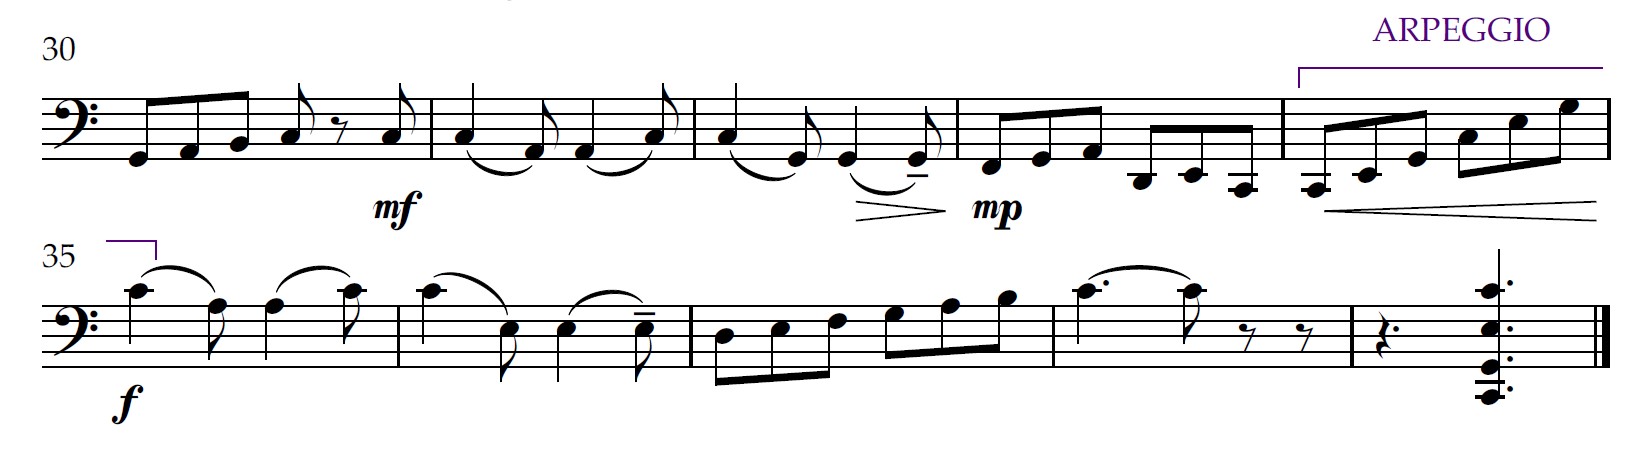
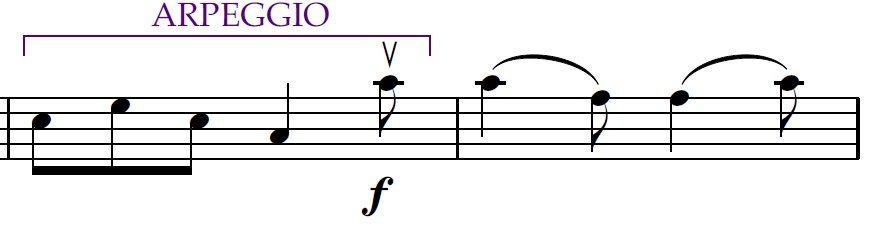
Talk through how these compare to the ones learned in the scales and arpeggios. What note is missing in the scale pattern at bar 19 to play a whole octave? Do we have all the arpeggio notes in bars 34 and 35 and, if so, how many octaves long is the arpeggio?
Suggest your student plays a two bar improvisation in 6/8 time with the notes of the arpeggio. As there are a lot of these patterns in the piece, talk about string crossing for the left hand and how the fingers move independently.
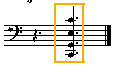
The chord at the end of the piece is probably the first four note chord most cellists at Grade 3 level will have played. Ask your student to play the notes separately first. It is important to explain at this point that the movement required for the bow to play all four notes needs to be one that follows the shape of the bridge.
3. Time
After discussing the time signature, identify together the different rhythmical patterns/units.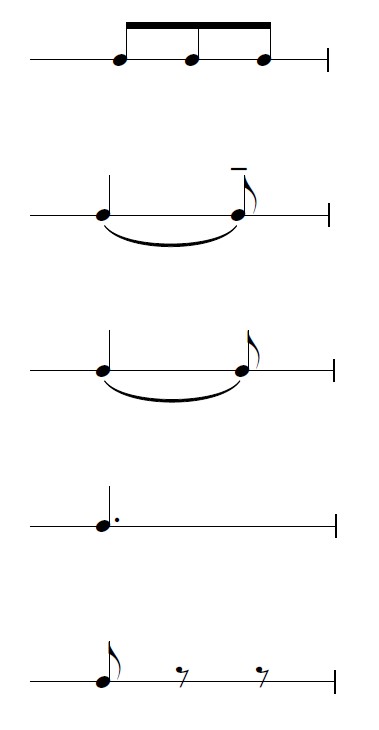
- You can clap these patterns together.
- Pluck them on different open strings for rhythmical precision.
- Bow them out on the open strings, discussing bow distribution and the best part of the bow to use for each pattern.
- Apply them to scalic motifs emphasising the importance of intonation in the more arpeggio-like patterns with a good coordination for the left hand finger string crossing.
4. Tone
Identify together the different articulation techniques needed. In this case rather than having the articulation printed on each note, we can find the word staccato printed at the beginning of the cello part. Discuss the meaning of the stroke with your pupils and how we can best achieve it. How does it look when printed on top of the note?Articulations to discover in this piece:
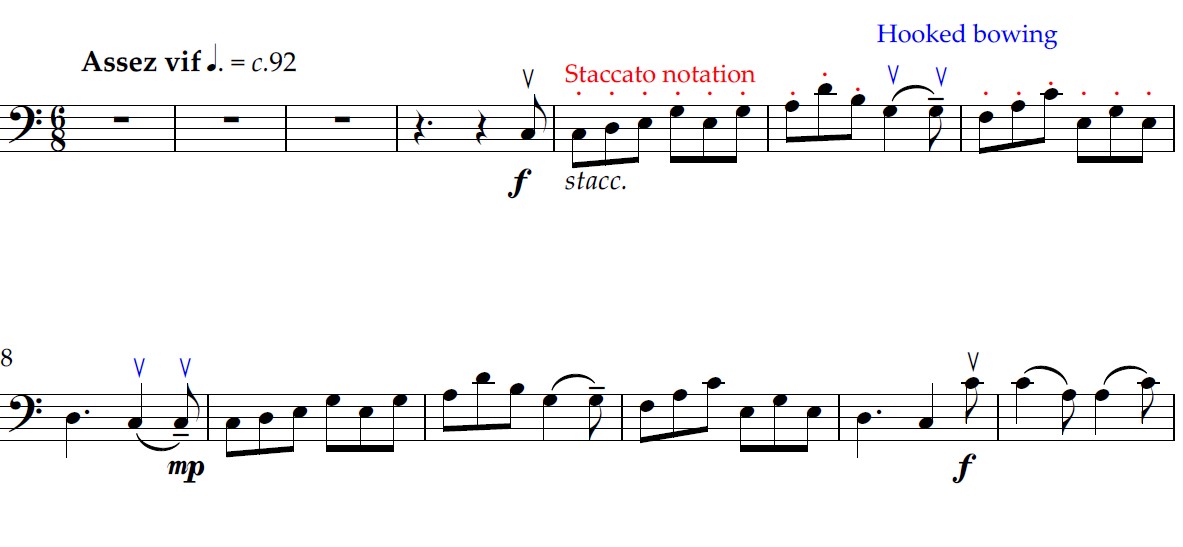
- Staccato
- Hooked bowing
Revisit the rhythmical patterns you worked on before and apply the articulations. At this stage you can also introduce tonal quality by looking into the dynamics needed for this performance mp, mf, f, ff.
Try to combine the different articulations with this variety of dynamics. Discuss the three aspects of sound production that enable us to change dynamics and sound colour.
- Bow length - Depending on the length of bow we can increase and decrease sound volume.
- Contact point - Depending on how close we are to the bridge we can change the intensity of the sound accordingly.
- Weight into the string - how much weight we apply into the string with our bowing arm to shape the volume.
5. Shape
Developing the understanding of 'phrase' by introducing call and response into this piece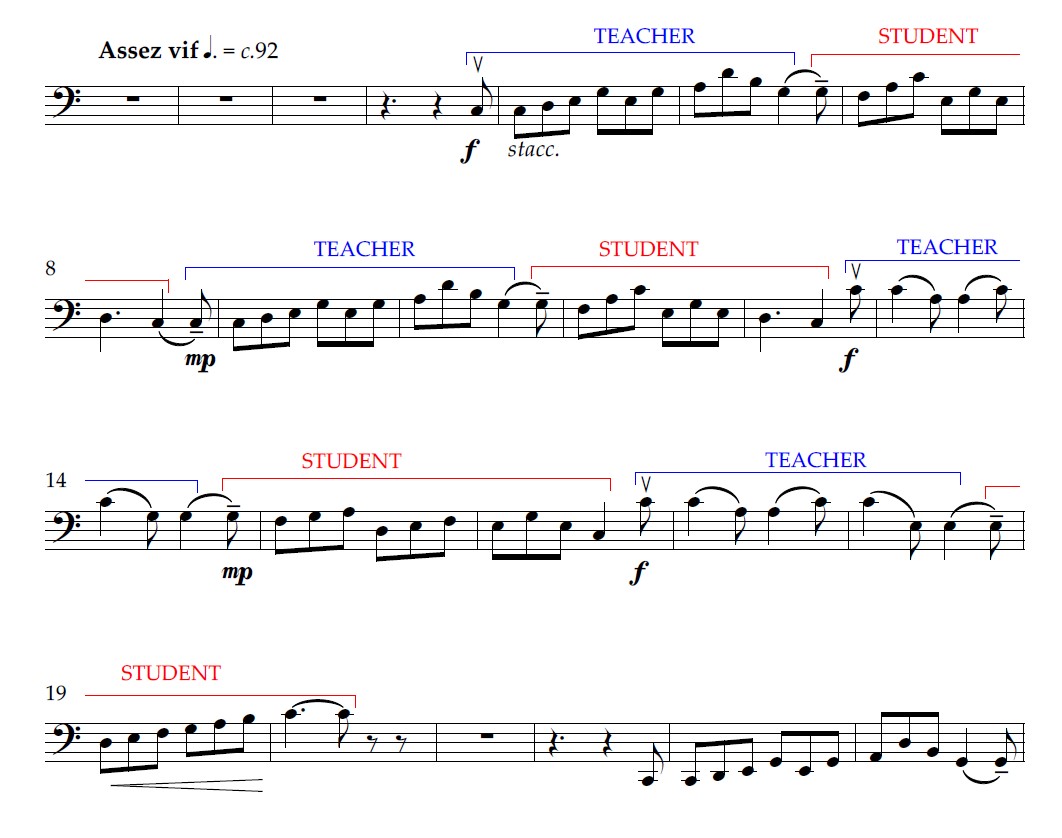
Teacher plays: upbeat, bars 5 + 6
Pupil plays: upbeat, bars 7 + 8
You can play the whole piece together using this pattern. It can also be particularly useful to isolate technical aspects of the performance. You can then swap parts with the pupil starting the call and you responding.
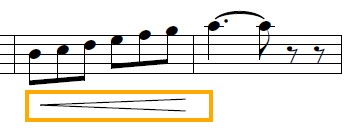
Work on effective crescendos within the forte at bars 19+20 and 37+38 - discuss bow length to achieve this.
6. Performance
Try to recreate the performance situation as similar as possible to what it is going to be in the exam/concert, maybe by asking your pupil to organise a small home concert for a family member, school assembly performance or by recording themselves playing. Before the start of the piece, it is important to hear the first few bars of the piece in their 'inner voice', focusing on the character, spirit and tempo of this particular work. Sometimes it is a good idea to ask your pupils to see if they can sing or whistle these first few notes, being aware of the piano introduction.You can also introduce the meaning of 'Assez Vif' to your pupil - rather fast, played very rhythmically. One of my favourite musical works for strings that has the same marking is the second movement of the String Quartet in F Major by Ravel. Ask your pupil to listen to both pieces and compare them.